If you’re tired of all the leaks and exploitation, or are fed up with the concerns over possible censorship, you may be considering dumping your Facebook account for good.
Here is how to do that.
First, make sure that it’s something you want to do. There are behaviors you can change on Facebook to improve your experience on the platform if the content you’re seeing isn’t what you had hoped it would be. For instance, many people use Facebook as a means of communicating with family but don’t wish to be mired in the sharing of “fake news.” If that’s the case, getting rid of all “liked pages” and unfollowing or blocking accounts that aren’t of the utmost importance to you will help you curate a better news feed.
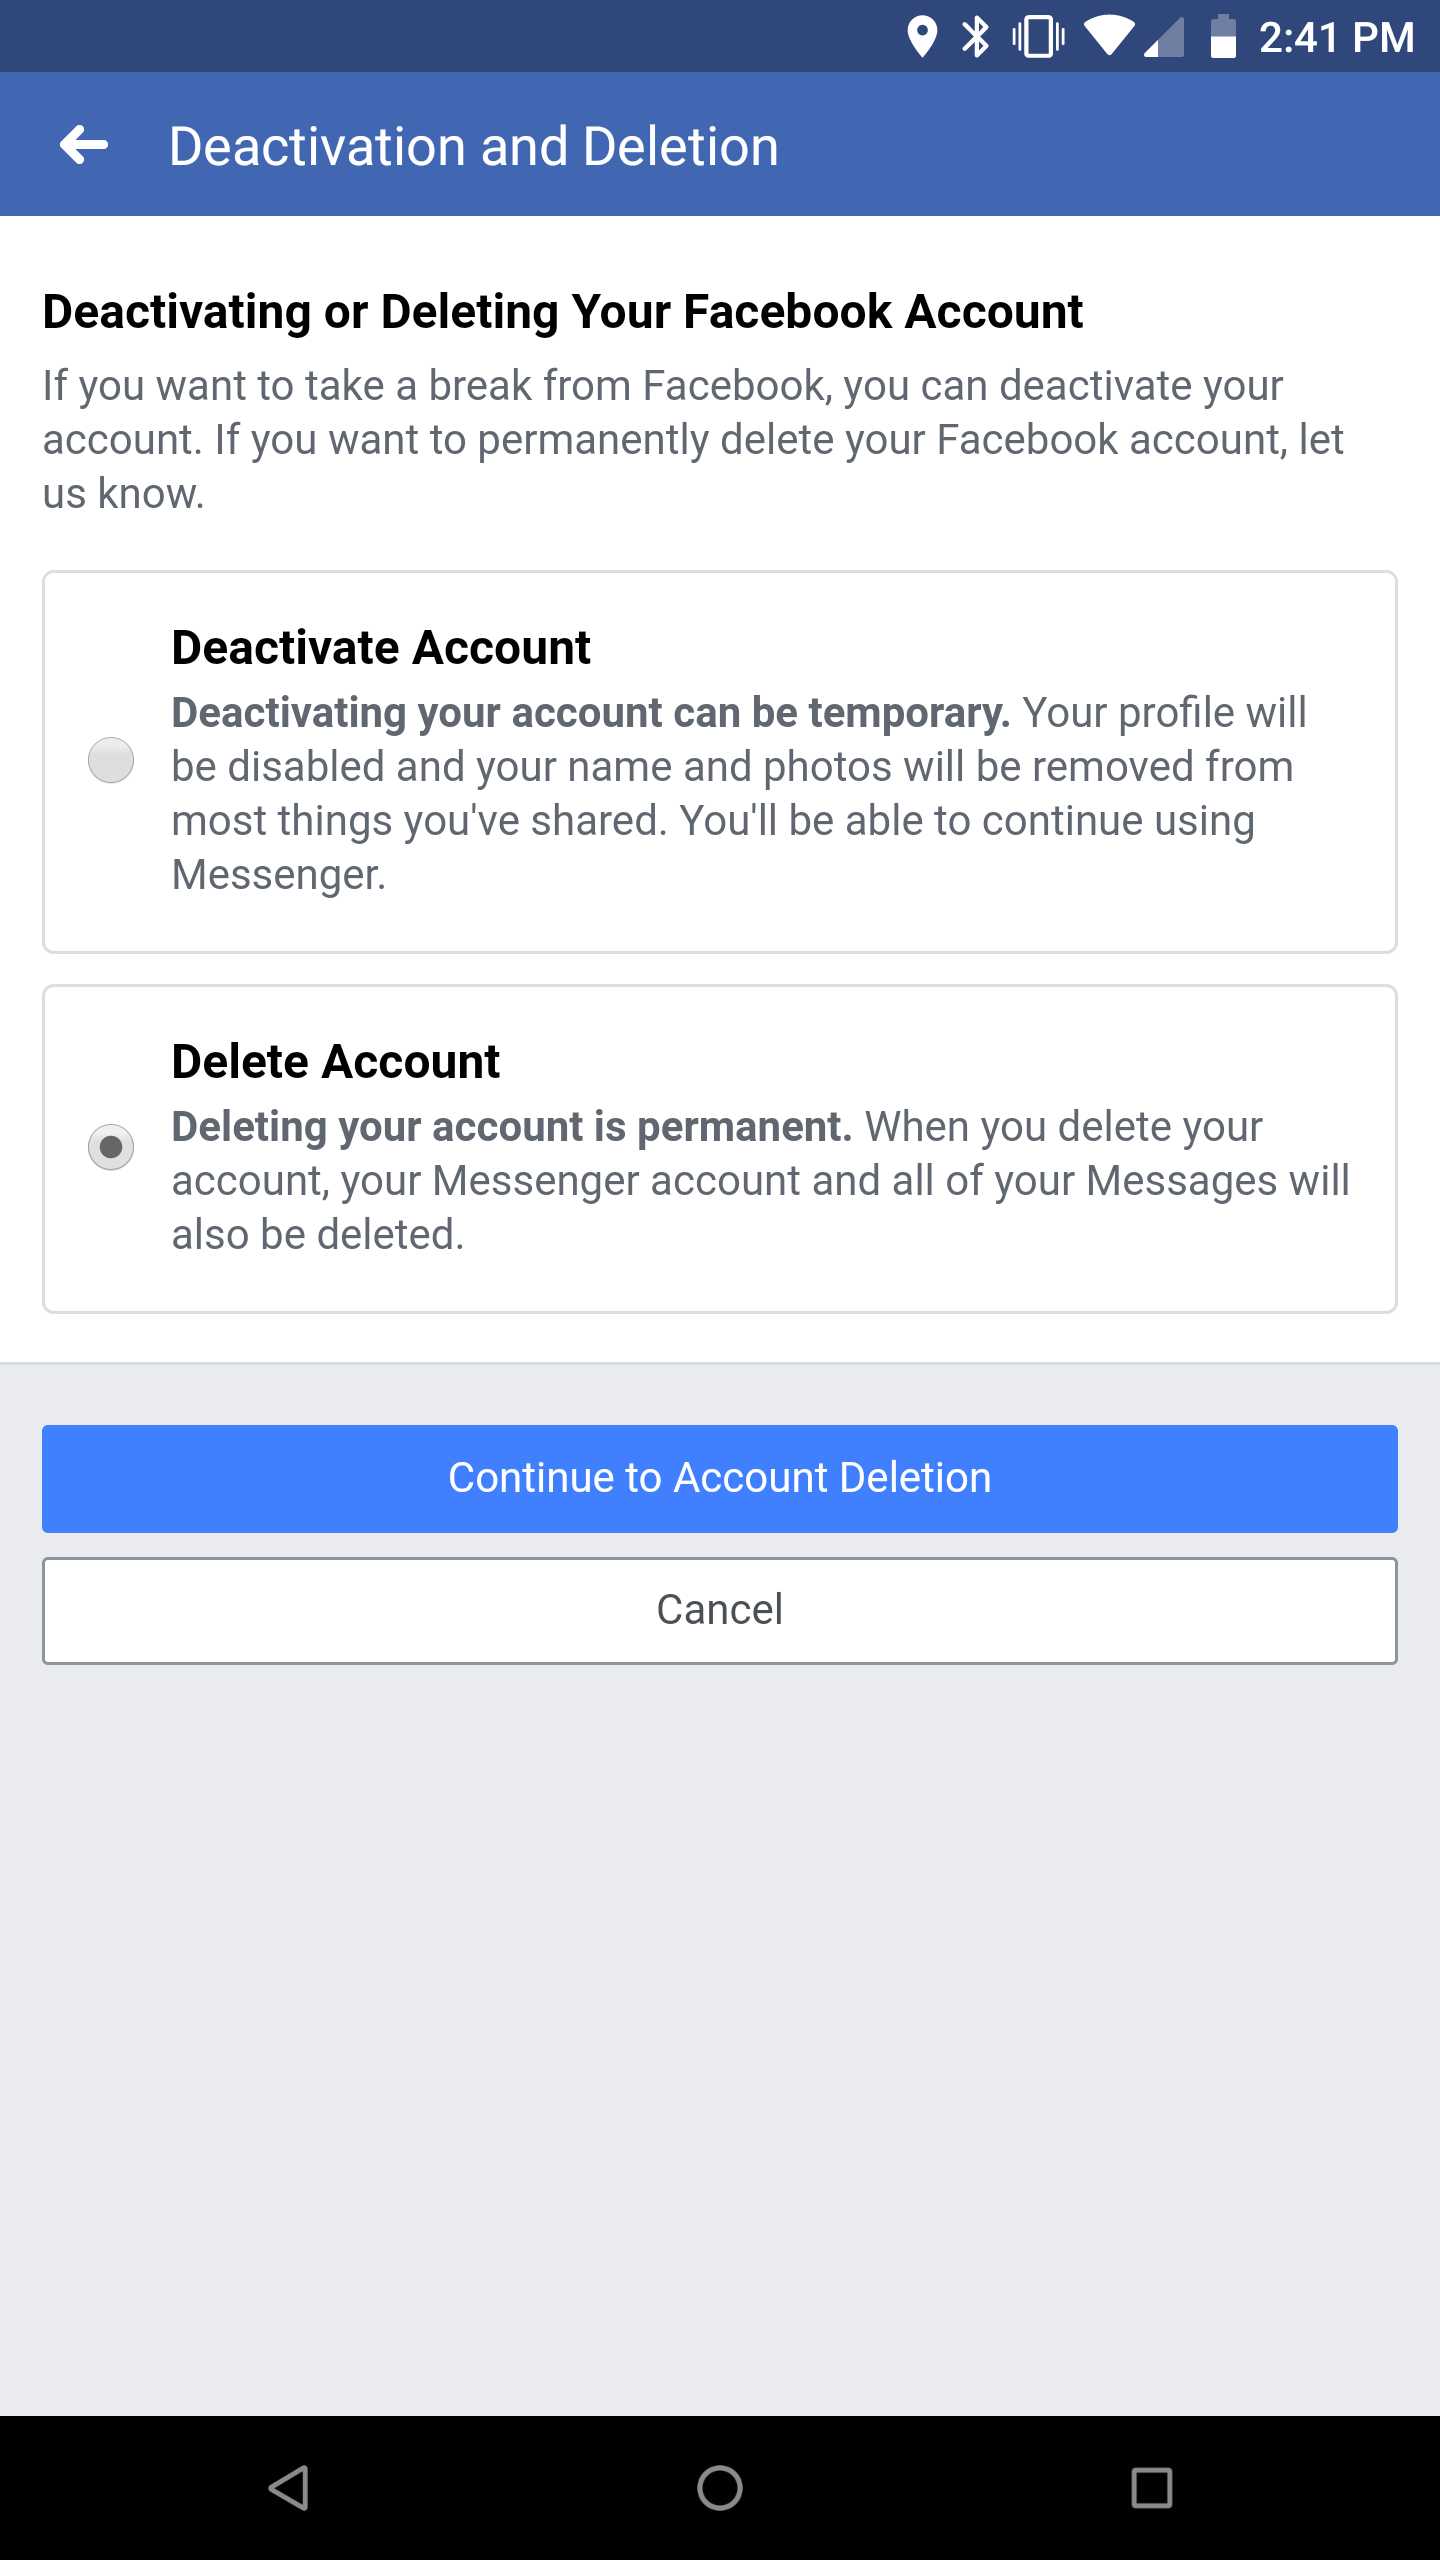
Facebook provides two options of taking yourself off Facebook. The first is deactivation. This is the option that Facebook makes most obvious. In certain menus, it’s the only option you see. This is considered the “temporary” solution. Deactivating your account makes you and your content invisible to anyone using Facebook, but it is reversible at any time by logging back in. Nothing is permanently deleted using the deactivation method. This is a common method for people wanting to “take a break” from Facebook.
The permanent solution is account deletion. Facebook offers a brief, but handy, explanation on the ramifications of deleting your account.

If this is what you want, here’s a step-by-step guide to getting it done.
Step 1: Navigate to “Account Settings” in the Facebook app.
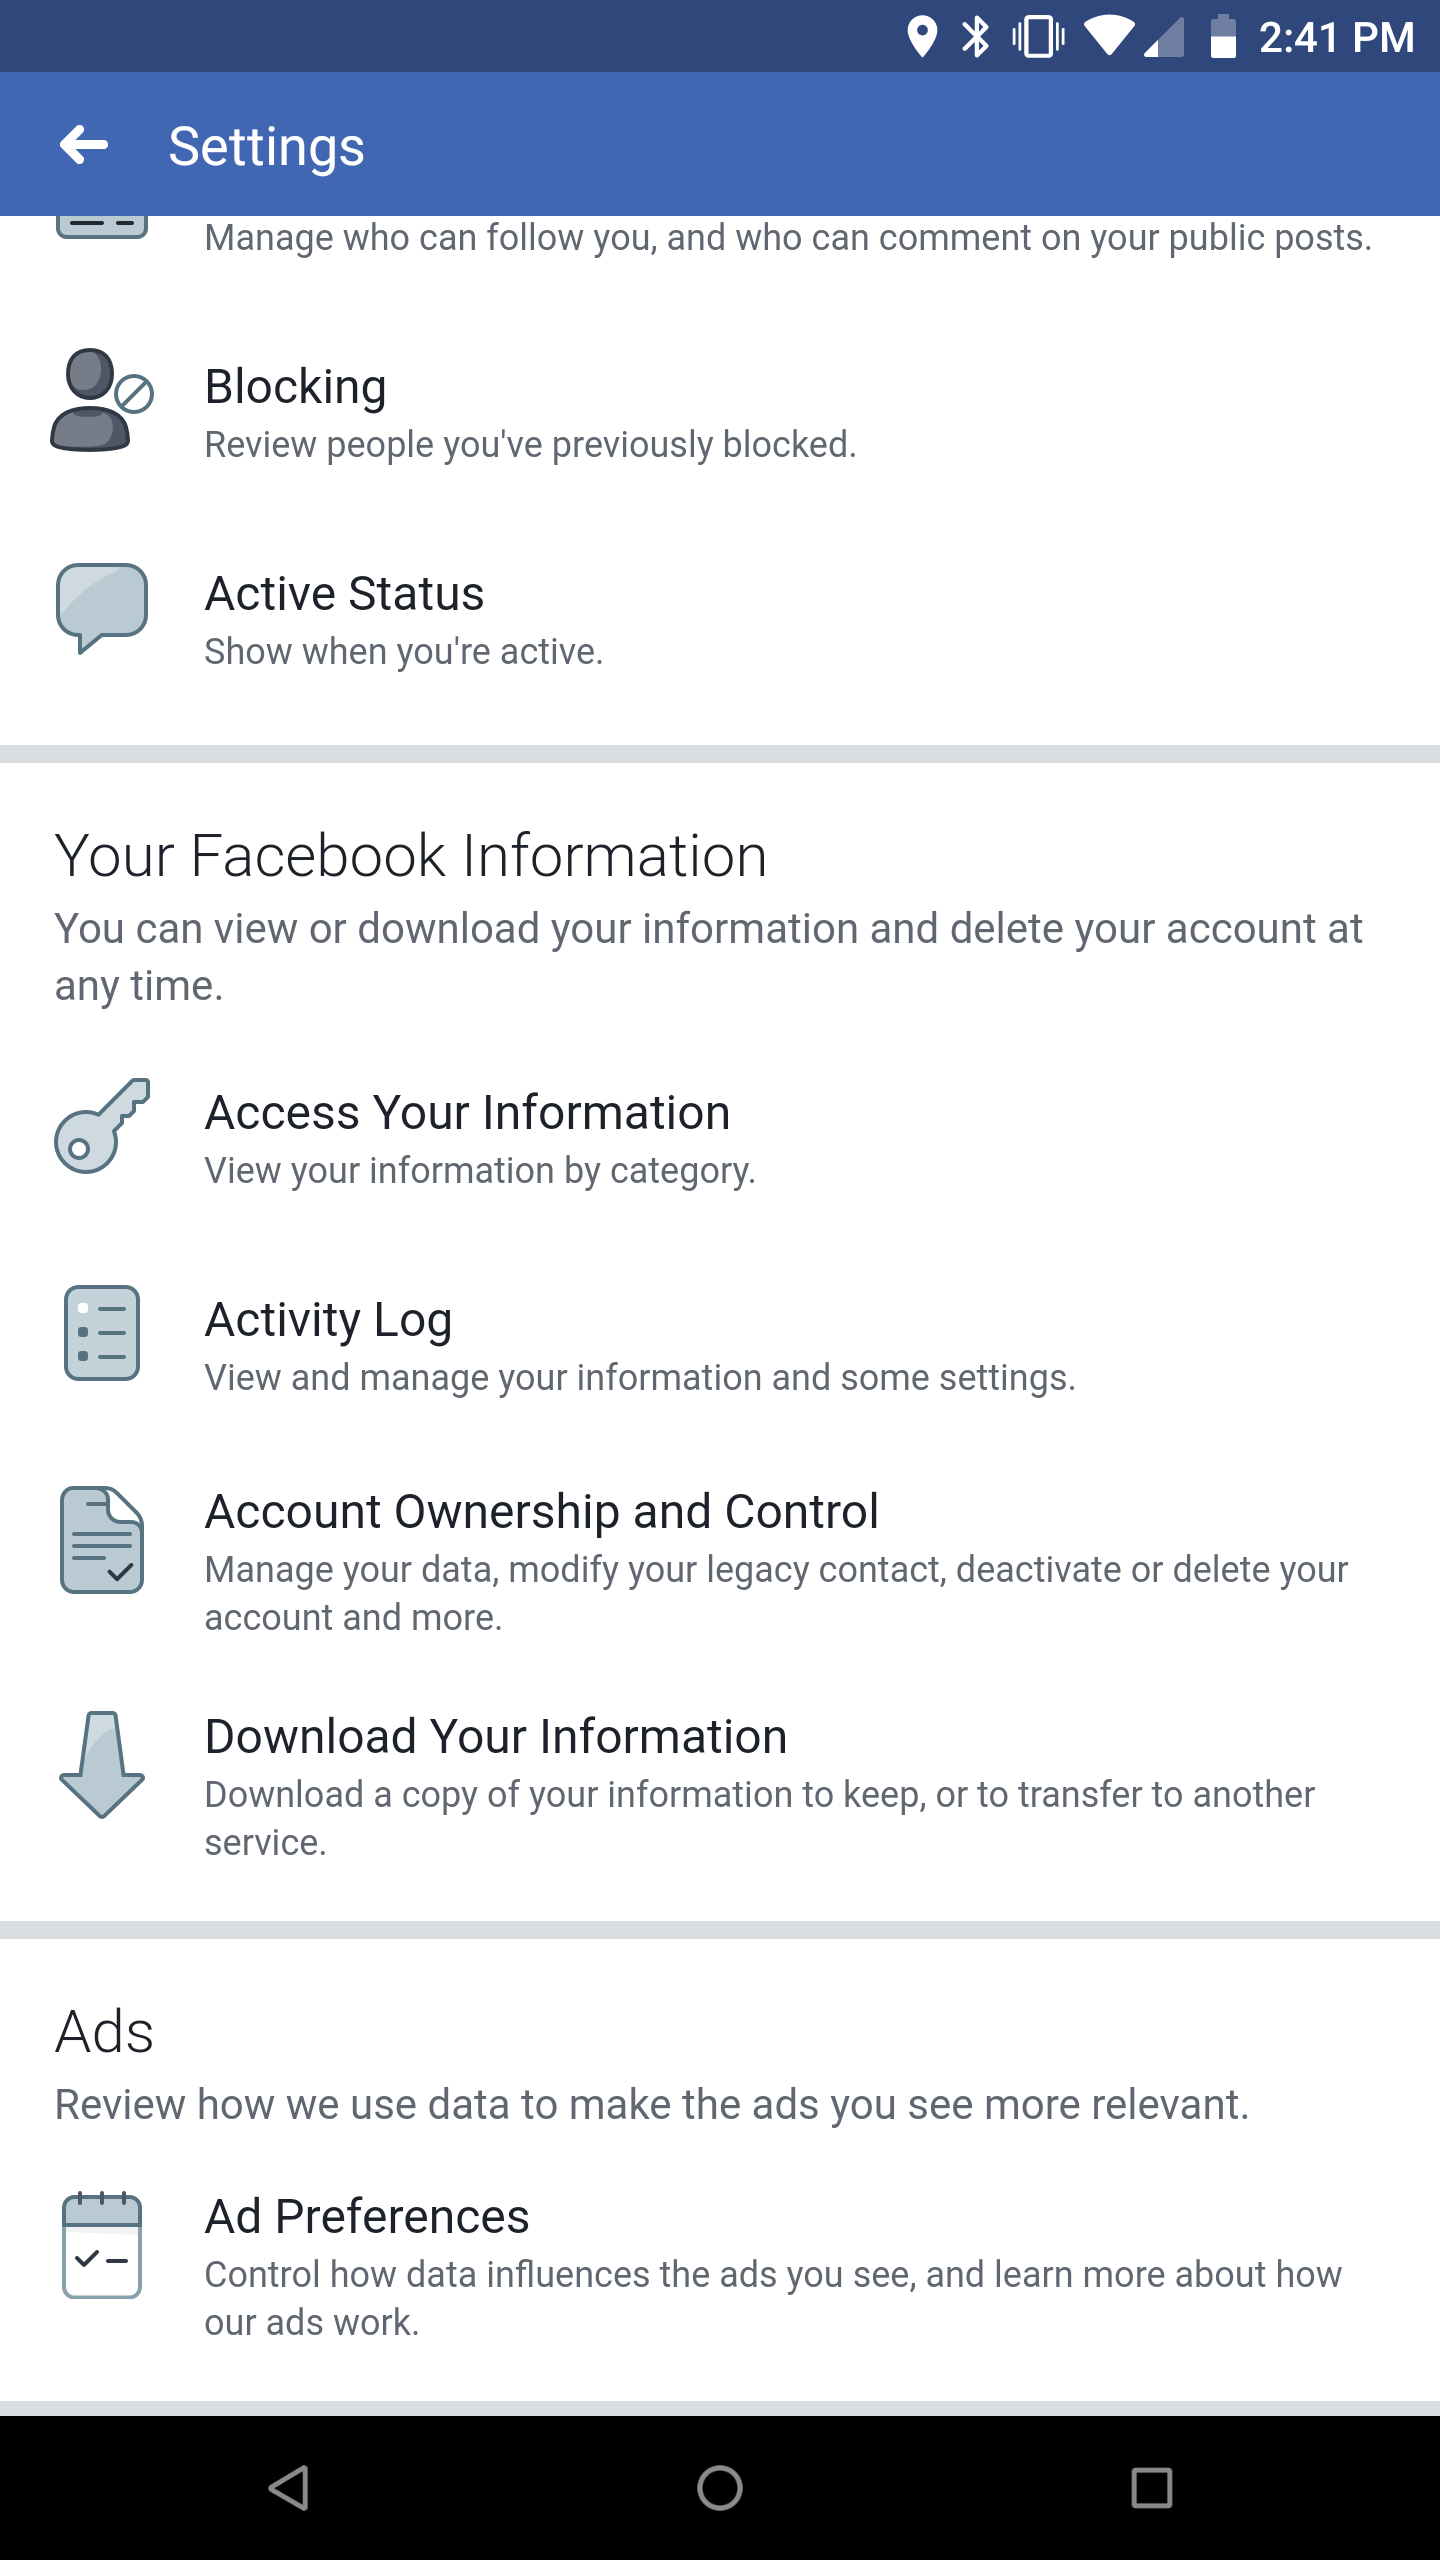
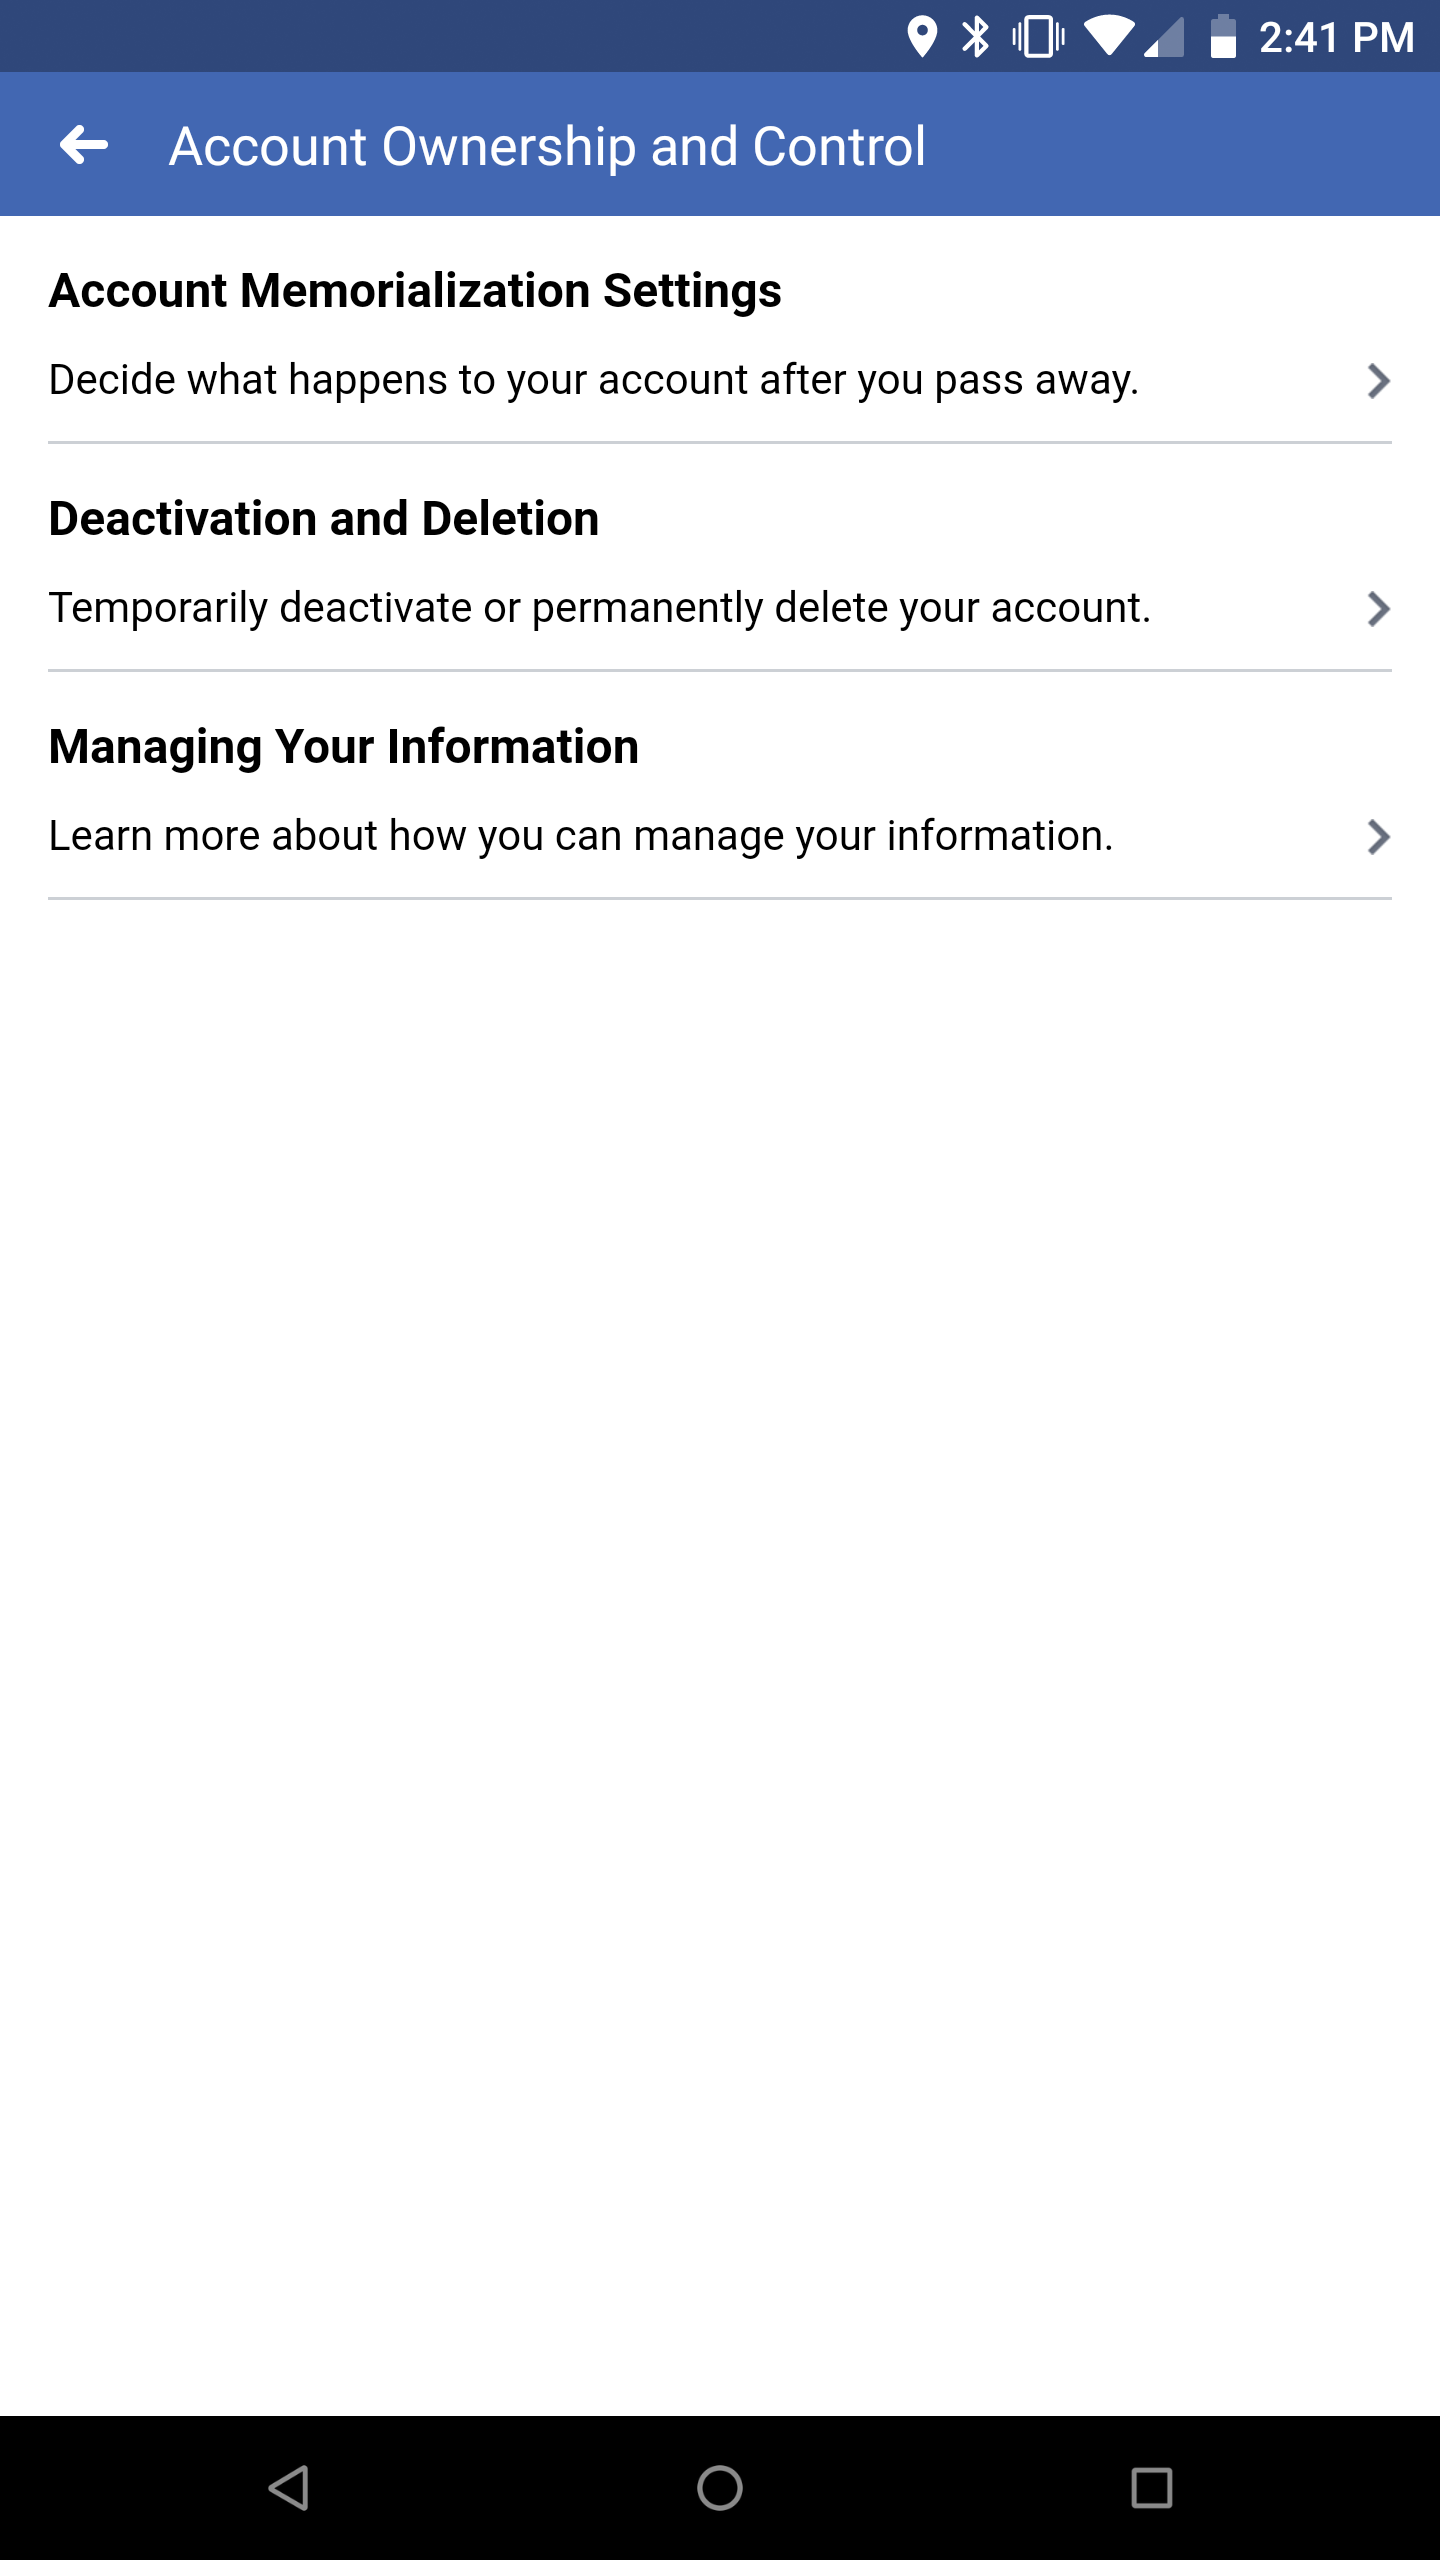
From “Account Settings,” locate the section that says “Account Ownership and Control.”
Step 2: Select “Deactivation and Deletion.”
Step 3: Select “Delete Account,” then press the button labeled, “Continue to Account Deletion.”
Step 4: Press “Delete Account.”
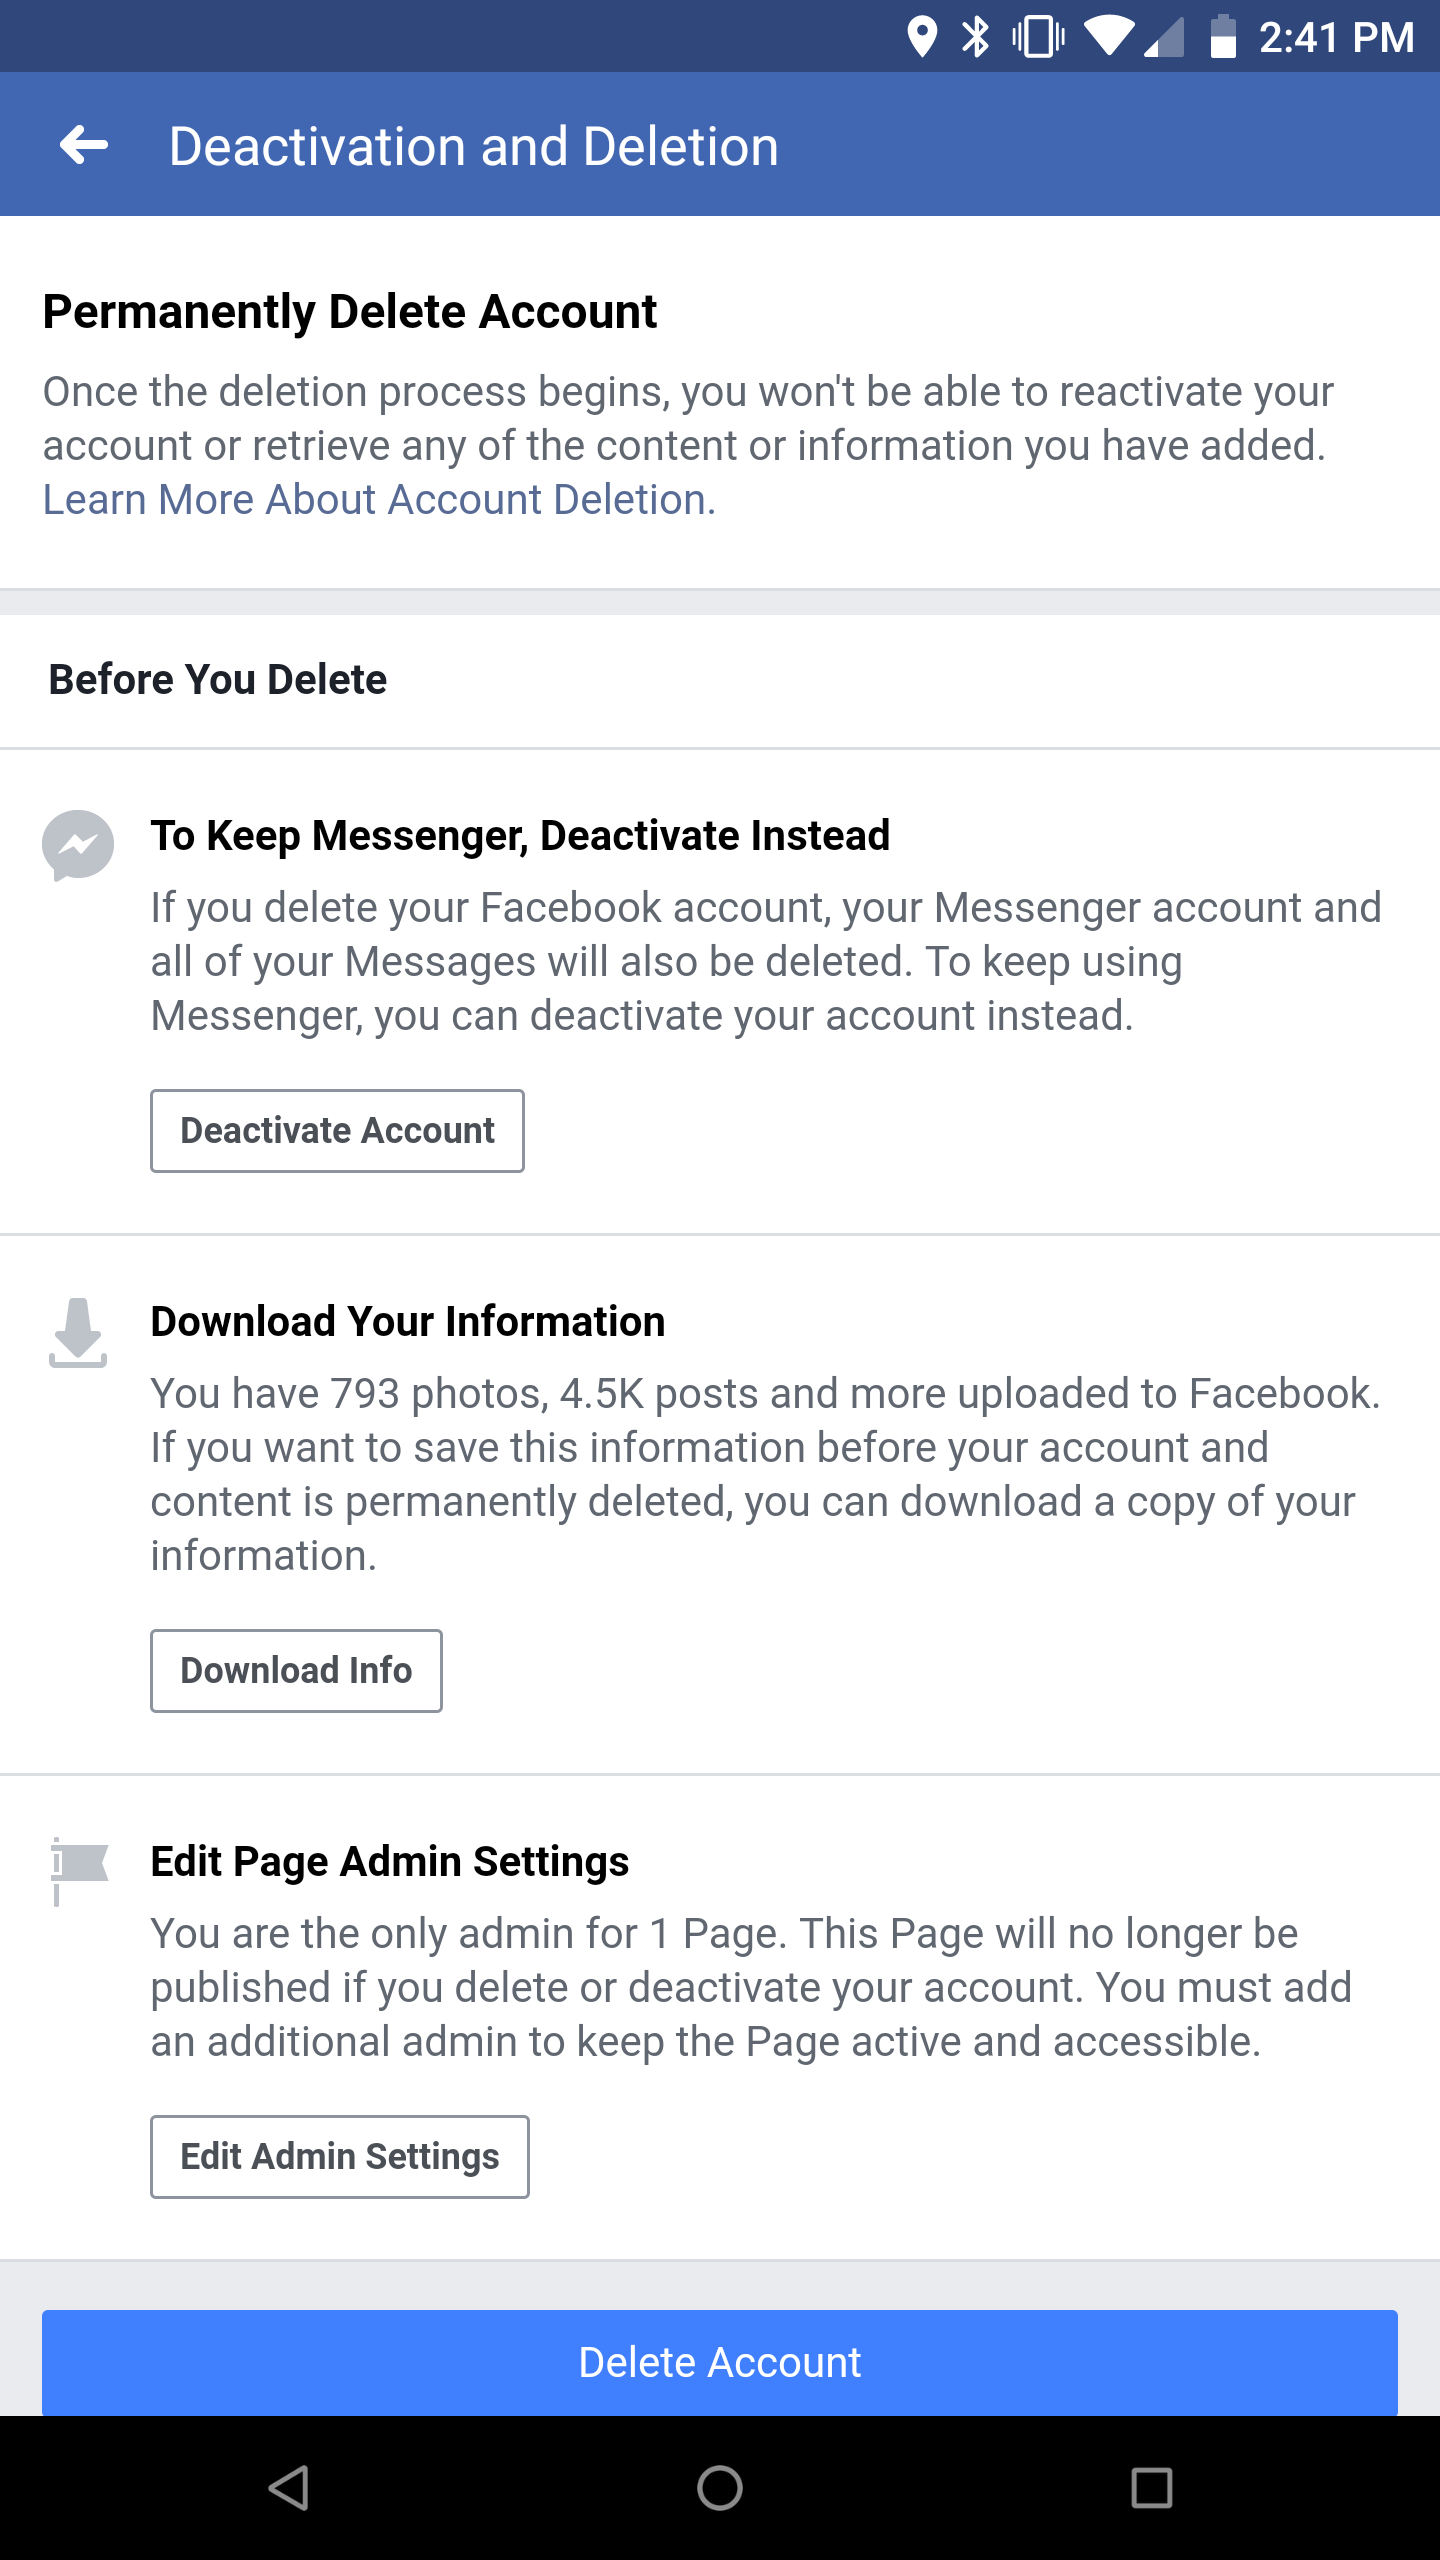
This is it, the main event. Scroll past all the supplemental information about account deletion and find the big button at the bottom with the words “Delete Account.” Hit that button and the process has begun. That’s right; it’s not final. Hitting that button is not the end of your Facebook account. Instead, your account is merely scheduled for deletion 30 days from when you choose to delete it. It will sit there, deactivated, for 30 days until it is finally deleted. If you change your mind, you may log back in to Facebook in that 30-day window, which cancels the deletion. After that 30 days, however, your account will be gone, lost forever to the cosmos of the Internet. Facebook says that it could take up to 90 days for everything about your account to be completely deleted, even from backups.
Optional Step: Download your information.
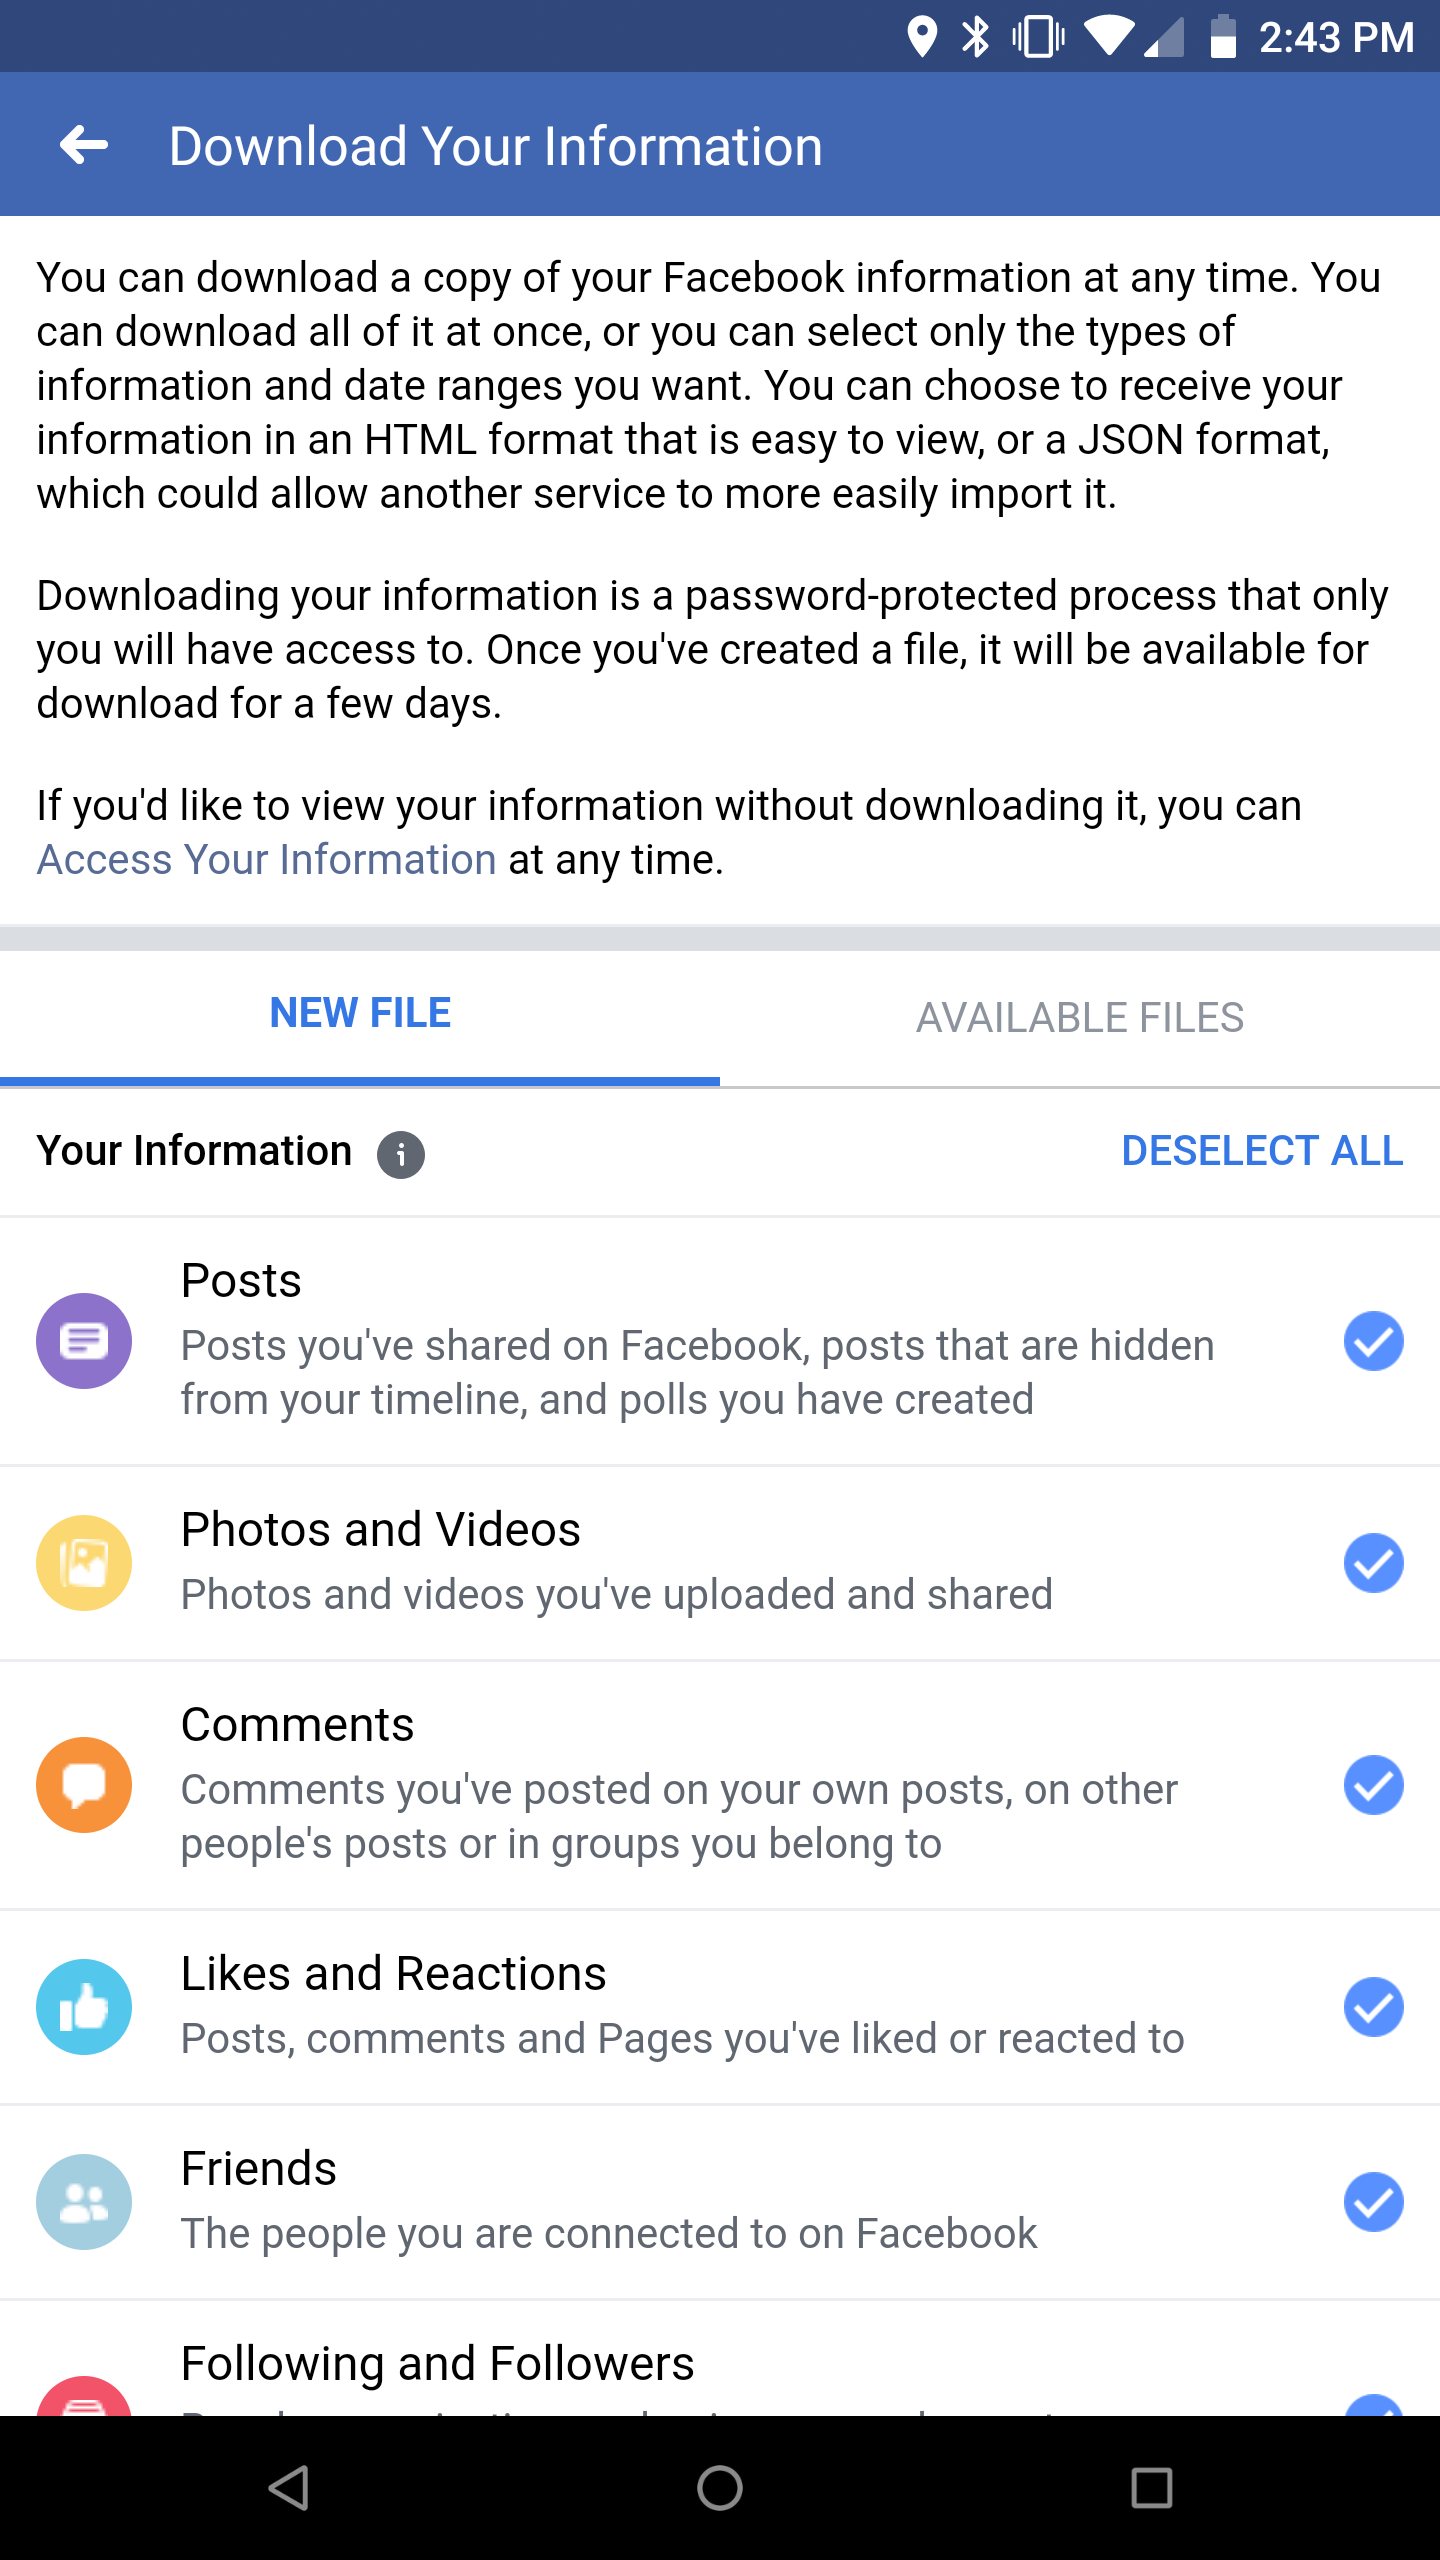
Before deletion, Facebook gives you the option of downloading a copy of everything you’ve put on Facebook. For instance, if there are any photos or videos you uploaded back in 2008 but no longer have, you can have them back! You can piece and parcel out what you want to download and add it to your computer in either an HTML or JSON file. It’s as simple as selecting what you want to keep and then selecting download.
There you go! Your Facebook account is on the path to deletion. If you have seller’s remorse, you can always start fresh with a new account, but if you’ve come this far, you’re probably confident that this is the path you want to take, and you’re not alone. Even people like MSNBC’s Kasie Hunt have chosen to leave Facebook, posting on Twitter that she just doesn’t trust the company anymore.
I’m out. @facebook pic.twitter.com/U9LXC3D1Zj
— Kasie Hunt (@kasie) December 19, 2018
If you also want to rid yourself of Facebook-owned Instagram, there’s a quick process on Instagram’s website that takes you through several prompts. If you want to keep the photos and videos you have shared, there’s an option to do that in the Instagram app settings as well.